Lead flashing is used differently depending on the roof detail
Lead flashing is a shaped weathering material used to stop rain from entering the vulnerable junctions of a roofing system. It is commonly found where tiles, slate, felt, masonry, chimneys, dormers, roof edges or upstands meet another surface. The same lead material may be used around a chimney, against a wall, along a flat roof upstand or near a valley, but the correct detail is different in each position.
For a homeowner, this distinction matters because a leak near leadwork does not always mean the lead itself has failed. In some cases, the issue may be linked to poor chase cutting, cracked mortar, missing soakers, failed felt upstands, blocked drainage, porous brickwork or movement in the surrounding structure. If the damp appears near a valley line, it is worth understanding how a roof valley drainage detail differs from ordinary wall or chimney flashing. A reliable repair starts by identifying which part of the detail has stopped doing its job.
Why lead is still used on UK roofs
Lead has remained common on UK roofs because it is flexible, durable and easy to dress into awkward shapes. It can be formed around brickwork, tiles, chimneys, dormers and edges without needing a rigid manufactured profile for every junction. This makes it especially useful on older properties where roof lines are rarely perfectly straight.
The material also copes well with normal building movement when it is installed in suitable lengths and fixed correctly. Roof coverings expand and contract with temperature changes. Brickwork, timber decks, tiles, slate and felt systems all move in slightly different ways. Leadwork remains useful because it can bridge those materials while still directing water away from the joint.
However, lead is not a magic seal. If it is trapped too tightly, installed in long unsupported pieces, dressed badly or sealed only with surface mastic, it can crack, lift or allow water to pass behind it. For a wider explanation of repair situations, see this guide to common flashing repair methods.
Lead flashing against walls
Wall abutments are one of the most common places for lead flashing. This is where a roof covering meets a vertical wall, such as the side of a house, a rear extension, a parapet wall or a dormer cheek.
A correct wall flashing detail normally relies on a chase cut into the masonry joint. The upper edge of the lead is inserted into the chase, secured, and sealed. The lower section is then dressed over the roof covering or upstand so rainwater is directed back onto the weatherproof surface below.
The common mistakes are shallow chasing, weak mortar, short cover over the roof covering, or relying on silicone alone. If rain is driven against the wall, water can pass behind the flashing or soak through defective brickwork above it. On many older Sussex properties, the wall itself may need checking as carefully as the visible lead.
Lead flashing around chimneys
Chimney flashing is more complex because water has to be controlled on all sides of the stack. A chimney normally needs front apron flashing, side flashing or soakers, and a back gutter or rear flashing arrangement to divert water around the stack.
A leak near a chimney can come from several different places:
- Front apron failure: water enters where the lower face of the chimney meets the roof covering.
- Side soaker failure: water gets past the stepped side detail between the tiles and brickwork.
- Back gutter problems: water collects or backs up behind the chimney instead of being carried away.
- Cracked pointing: moisture enters through the chimney masonry rather than through the lead itself.
- Loose flashings: the lead pulls out of the chase as mortar deteriorates.
This is why chimney leaks are often misdiagnosed. Re-sealing one visible edge may not solve the issue if water is entering through the back gutter, cracked flaunching, open brick joints or failed side soakers.
Lead flashing on flat roofs
Flat roofs use lead flashing mainly at wall junctions, upstands, parapets, dormers, bay windows and small roof edges. The lead normally works together with the main waterproofing system, such as SBS torch-on felt. The felt or membrane should turn up the wall first, and the lead should protect the upper edge from rain and weather exposure.
If the upstand below the lead is too low, loose, cracked or poorly bonded, new flashing alone may not be enough. The flat roof covering and the wall detail have to work together. Water can also track by capillary action through narrow gaps, especially where old sealant has opened or where the lead does not provide enough cover.
On bay windows, porches and rear extensions, the roof area may be small but the flashing detail is still critical. A compact roof can leak badly if the wall line above it is not protected properly.
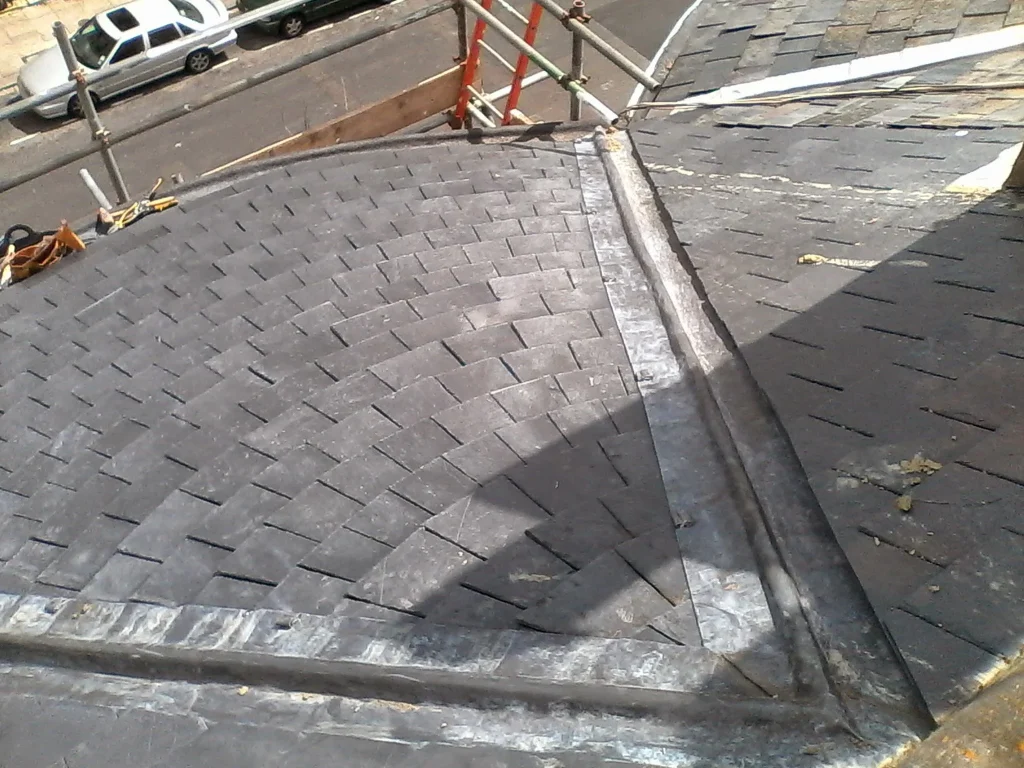
Lead in valleys and roof drainage details
Valleys are channels where two pitched roof slopes meet. They collect much more water than a normal tile course, so the detailing must allow rain to move down the roof without restriction. Some valleys use lead; others may use GRP valley troughs, valley tiles or proprietary systems.
When lead is used in a valley, the width, support and side cover are important. If tiles are cut too tightly, debris can collect and slow the water down. If the valley is too narrow for the roof area, heavy rain may overrun the sides. If the lead is unsupported or split, water can reach the underlay and roof timbers below.
Valley problems are not the same as wall flashing problems. A wall flashing mainly protects a junction. A valley is part of the roof drainage path. That means inspection must include tile alignment, debris build-up, roof pitch, lead condition and the way water flows during heavy rain.
Signs that lead flashing may be failing
Lead flashing defects are not always obvious from ground level. Some warning signs are visible outside, while others appear inside the property after rain.
- Cracks, splits or holes in the lead.
- Lead lifting away from brickwork or tiles.
- Old sealant peeling, shrinking or separating.
- Mortar missing above the flashing chase.
- Damp staining near chimney breasts, ceiling edges or upper walls.
- Leaks that appear mainly after wind-driven rain.
- Repeated patch repairs in the same location.
- Water marks around bay windows, dormers or rear extensions.
The timing of the leak can help with diagnosis. A leak after heavy rain and wind often points toward an external weathering defect. Damp that appears in cold dry weather may be condensation rather than rainwater entering through the leadwork.
What a roofer should check before recommending work
A proper lead flashing inspection should follow the water path. It is not enough to look for a visible gap and seal it. The surrounding roof covering, wall condition and drainage all influence whether the leadwork is actually the cause.
For a wall detail, the inspection should check the chase, mortar, lead cover, roof upstand and brickwork above. For a chimney, it should include the front, sides, rear, flaunching, pots and surrounding tiles. For a flat roof, the felt upstand, deck condition and edge detailing should be assessed. For a valley, water flow and tile cuts matter as much as the visible lead.
If the defect is clear and local, a repair may be straightforward. If the detail has been patched many times, or if the roof material below has failed, the repair may need to include more than just the flashing.
Repair options for lead flashing
The right repair depends on why the detail failed. A small section of loose lead may need resetting into the chase and re-pointing. Failed sealant may need removing and replacing with a more suitable finish. Cracked or fatigued lead may need a new section installed with proper allowance for movement.
Common repair methods include:
- Re-sealing a sound lead chase where the seal has failed.
- Re-pointing the mortar joint above the flashing.
- Replacing a cracked section of lead.
- Installing new stepped flashing or soakers around a chimney.
- Rebuilding a flat roof upstand before fitting new lead over it.
- Improving a valley detail where water flow is restricted.
Surface patching can sometimes reduce water entry temporarily, but it should not be confused with a proper long-term repair. If the lead has split because it cannot move, covering the crack with sealant does not remove the stress that caused the split.
When replacement is more sensible
Replacement may be the better option when lead is badly cracked, too short, poorly chased, incorrectly lapped, or installed in a way that does not suit the roof detail. It may also be needed when several separate defects appear along the same junction.
Replacement is also worth considering if old repairs have built up in layers. Cement, tape, thick mastic and incompatible coatings can hide the real condition of the lead and make future repairs less reliable. Removing the failed detail and rebuilding it properly may be more practical than trying to preserve poor work.
On flat roofs, replacement of the lead may need to be combined with repair to the felt upstand. On chimneys, new leadwork may need to be combined with repointing or chimney repairs. On valleys, it may involve tile lifting and re-forming the water channel rather than simply inserting new lead into the visible area.
What affects the cost of lead flashing work
Lead flashing cost varies because the work is detail-based rather than purely measured by length. A short chimney section on a steep roof can take longer than a longer wall flashing at low level. Access, height and complexity often affect the price as much as the amount of lead used.
The main cost factors are:
- Access and height: chimney and high roof work usually takes more time to reach safely.
- Type of detail: walls, chimneys, valleys and flat roof upstands all require different methods.
- Lead specification: the correct lead code and width depend on the application.
- Wall condition: poor brickwork or failed mortar may need preparation before flashing is fitted.
- Surrounding roof condition: broken tiles, failed felt, rotten decking or blocked drainage can change the scope.
- Removal of old repairs: heavy layers of sealant or cement can add labour before proper work can begin.
For a clear starting point, the lead flashing cost calculator for Sussex homes can help show how chase cutting, Code 4 lead, sealing and patination oil affect the likely job scope.
Lead flashing and local Sussex roof details
In Brighton, Hove, Worthing and surrounding Sussex areas, lead flashing is often found on older terraced houses, chimney stacks, parapet walls, bay windows and rear extensions. These roofs can combine old brickwork with newer flat roof coverings or repaired pitched roof sections.
The main local issue is not that lead itself is unsuitable. The problem is usually the junction between old and new materials. Brickwork may be porous, mortar may be weak, and previous roof repairs may not have dealt with the wall or chimney detail properly. A new roof covering can still leak if the lead flashing above it is left in poor condition.
For homeowners comparing advice or previous repairs, this local roofing guidance for Brighton and Sussex properties explains why careful diagnosis matters before choosing a repair method.
Practical next step
Lead flashing should be assessed as part of the roof detail it protects. Around a wall, the masonry and roof upstand matter. Around a chimney, the front, sides and back all need checking. In a valley, water flow is the key issue. On a flat roof, the lead and membrane must work together.
If the lead is sound and the defect is local, repair may be enough. If the lead is cracked, badly fitted or repeatedly patched, replacement is often more reliable. Where the cause of damp is uncertain, a site visit for suspected leadwork leaks can help confirm whether the problem is the leadwork, the surrounding roof, the wall, the chimney or condensation inside the property.